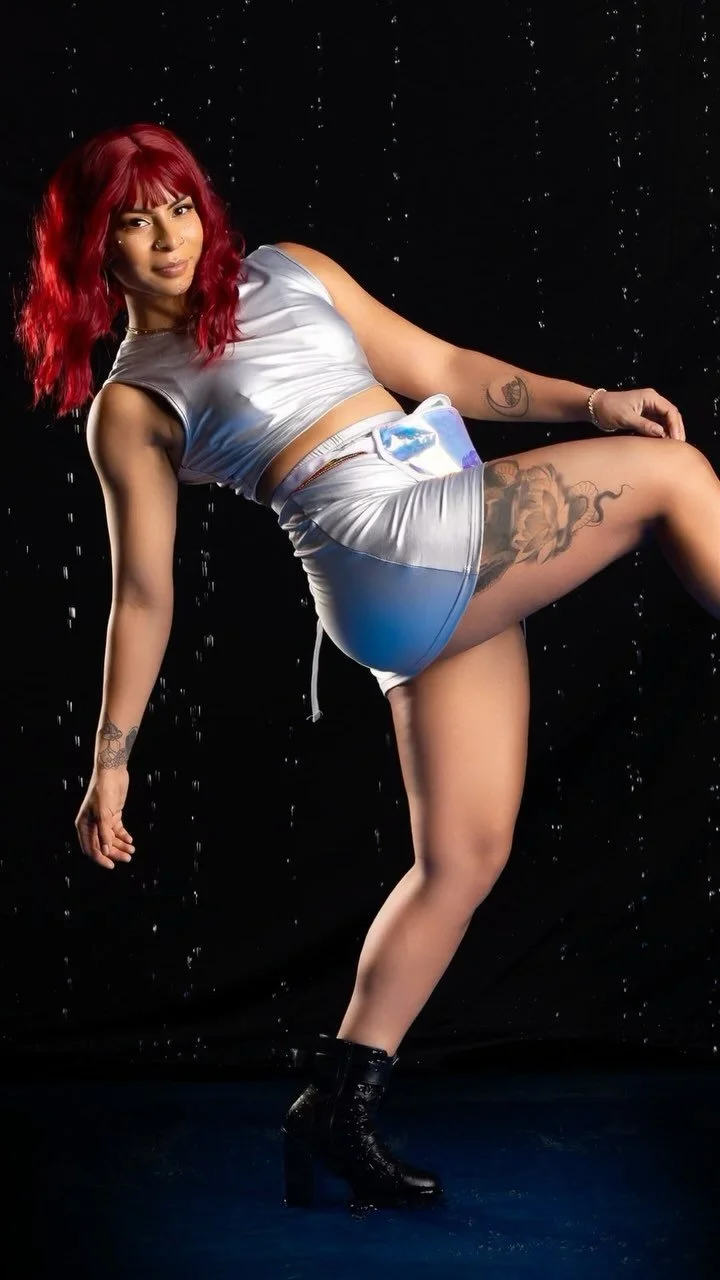
Dancer Photo session
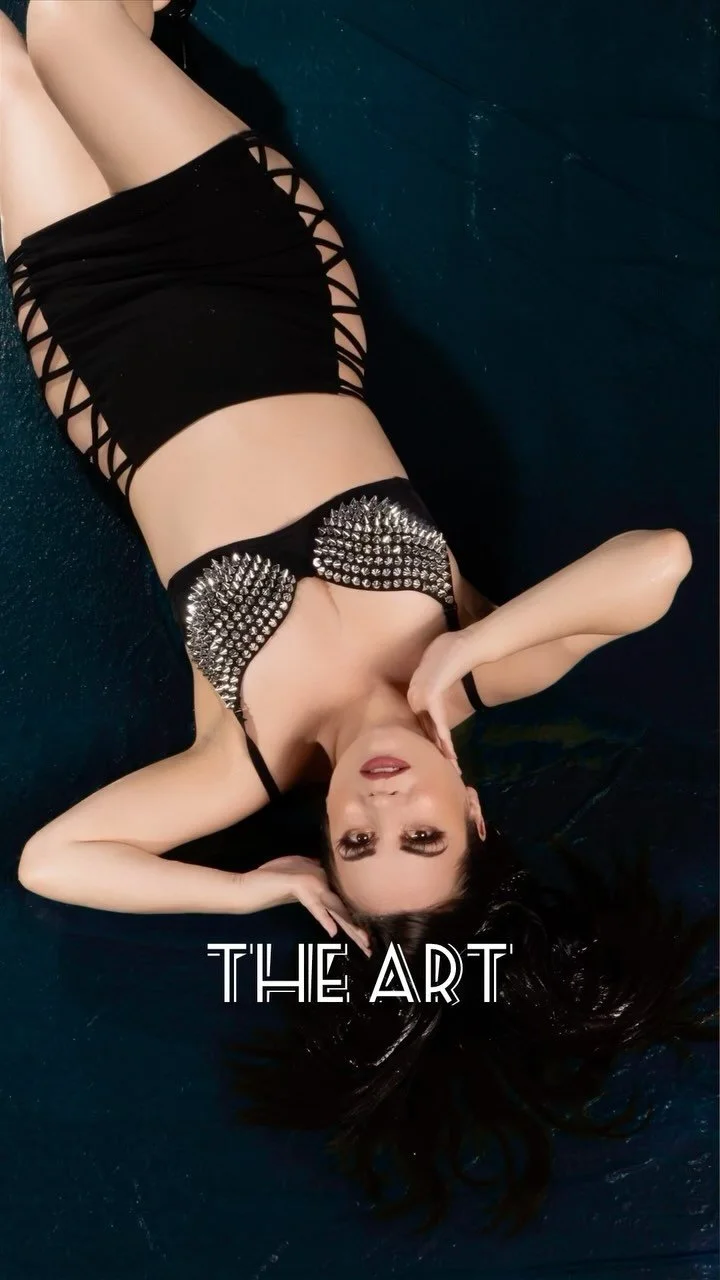
A photo session with a dancer is always a great experience. Dancers have spent a lot of time training and are well connected with their own bodies. This session I worked with Danielle, a professional dancer who has worked with some amazing people.
When it came to the session, we decided on a stage look. We achieved that with lighting. This choice was to showcase Danielle as bigger then life.

Creating this lighting style was a three light set up. This was a fairly simple lighting structure.
We had the key light at the 11pm hour to camera. I used the Godox 400 pro found here. The Key light was on top of a light stand with a standard reflector. Key light was set to 1 stop brighter then the camera settings. I am not going to list my camera setting, the settings were selected for that specific location to eliminate all ambient light.
The rim light was set at the 2am clock position. Same light model as the key light, Godox 400 pro. We used a 12” x 56” strip soft box with a grid to focus the light. The strip soft box creates a even rim light on the opposite side of the body to create separation of the subject from the background. The light power was set to 2.5 stops below the camera settings
The fill light was set at the 5pm clock position opposite of the key light. A Godox 600 pro set on a Flashpoint 10’ C-stand. The fill light used was in a 48” Octo soft box. Light power was set at 2 stops below the camera settings to just fill in the shadows created by the key light. We chose 2 stops biased on the look not by any scientific or photography rules. I suggest you play with the power ourself to find the balance to your liking. I placed the more powerful 600 light as a fill light only because of the limitations of the room we did this in. I didn’t have enough room to place a large C-stand where it needed to be without creating a trip hazard and getting the light stand in frame. I want to make as little extra editing as possble in post to make my deliverable time as efficient as possible. The Godox 400 pro was more then powerful enough to achieve our goal.
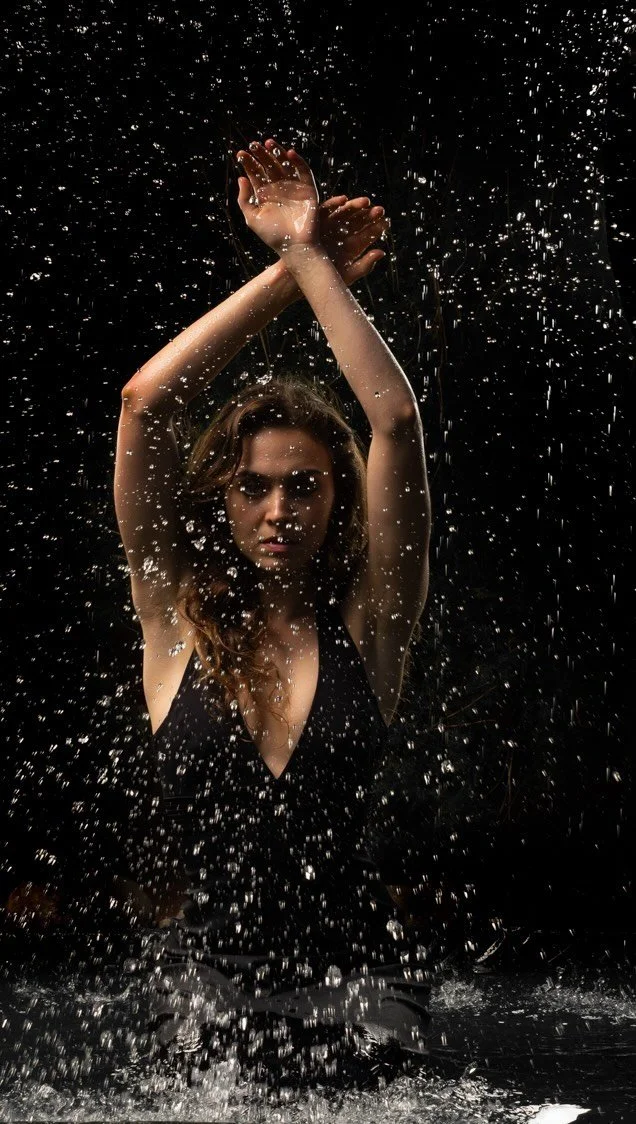
To help create the lens flair, a haze machine was used. The room we were using for this session was by no means small but it was an enclosed space. The enclosed space quickly filled with haze and adding smoke to parts of the image we didn’t want. We changed to using a can of atmosphere. Can of atmosphere does dissipate faster but it gave us more control of the smoke in the room.

The second image show the change in the smoke after the switch to atmosphere in a can.

To create the warm look of the second image a orange gel was used over the key light along with can of atmosphere. Creating this beautiful image.

This session was a great way to show off Danielle’s stage presence and capture some amazing images.

Model Danielle instagram @officialdboh
If yo want to create something unique and get in front of the camera, lets chat. set up a session consultation.
Equipment used: Sony A7RIV
Sony 70-200 GM Lens
Flashpoint xplor 600 pro strobe
Flashpoint XPLOR 400 PRO strobe
Flashpoint eVOLV 200 Pro II TTL Pocket Flash
60-inch Glow EZ-Lock OCTA softbox
Glow EZ Lock 48" Octa Small Quick Softbox
Glow EZ Lock 12x56 Quick Strip